2022
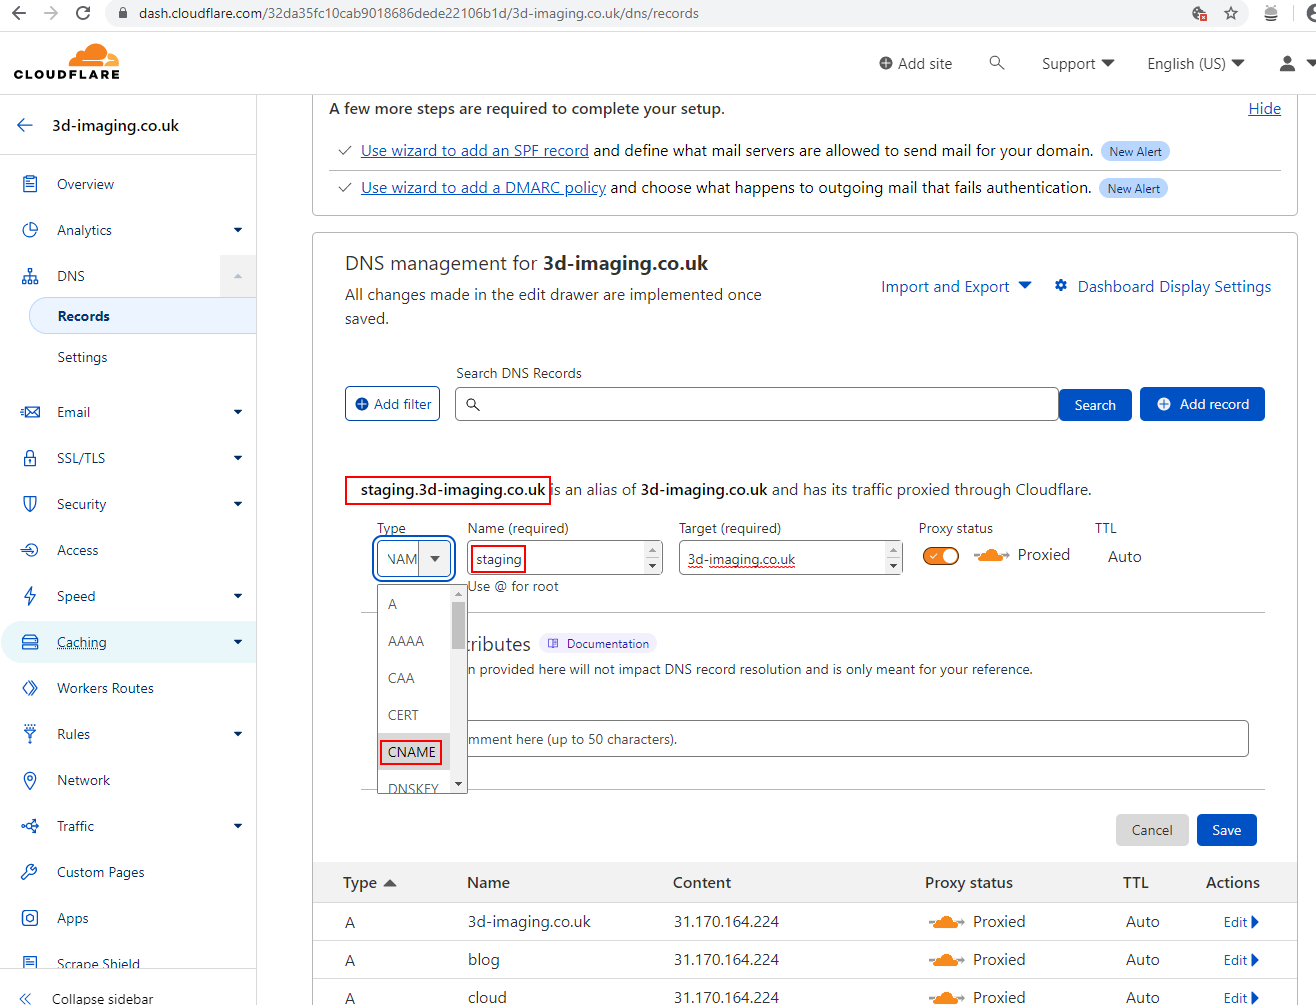
Cloudflare>DNS>Records>
Make this change and wait 24 hours:
Also need to amend these in the actual host to make it work:
Download Options
Every KeePassXC release is published in a variety of package formats:
- a *.dmg drag-and-drop installer for macOS
- an *.msi installer and a *.zip archive with binaries for Windows
- a self-contained executable *.AppImage for GNU/Linux.
- a *.tar.xz source tarball
Each of these package files has two related sidecar files, a *.sig containing a PGP signature and a *.DIGEST containing the SHA-256 hash for basic integrity checks.
Verifying Releases — Windows
The Windows MSI installation file is protected by an authenticode signature, this means that authenticity and integrity checks are verified directly by Windows when you run the program.
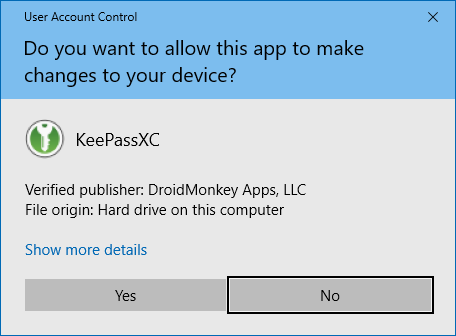
You should see the following dialog with DroidMonkey Apps, LLC as the verified publisher:
To verify the portal ZIP file, you must download and install Gpg4win. Then follow the verification instructions below.
Verifying Releases — macOS
The macOS release is signed with our Apple Developer ID, which is checked by the operating system on launch. You won’t be able to open KeePassXC after the installation if the signature check fails.
Verifying Releases via PGP — Linux, macOS, and Windows
A more thorough check can be made using the *.sig sidecar file. This contains an OpenPGP (GPG) signature created with one of our release keys. Signing files with any other key will give a different signature. Following these verification instructions will ensure the downloaded files really came from us.
Step 1: Import the public key
We will use the gpg program to check the signatures. Before you can do that you need to tell gpg about our public key, by importing it.
On Windows and macOS you will need to install the gpg program. On Windows, we recommend Gpg4win. On macOS we recommend GPG Tools or gnupg installed via HomeBrew.
The KeePassXC public key can be retrieved in any of the ways shown below:
From a keyserver:
gpg --keyserver keys.openpgp.org --recv-keys CFB4C2166397D0D2 From our website:
gpg --fetch-keys https://keepassxc.org/keepassxc_master_signing_key.ascThese are the fingerprints of the master key and the current signing sub keys:
pub rsa4096 2017-01-03 [SC]
 BF5A669F2272CF4324C1FDA8CFB4C2166397D0D2 uid [ unknown] KeePassXC Release <release@keepassxc.org> sub rsa2048 2017-01-03 [S] [expires: 2024-12-04]   C1E4CBA3AD78D3AFD894F9E0B7A66F03B59076A8 sub rsa2048 2017-01-03 [S] [expires: 2024-12-04]  71D4673D73C7F83C17DAE6A2D8538E98A26FD9C4
Notice that we have a master key and some sub keys. The actual signatures are created with one of the sub keys. As the naming implies, they are closely related to one another – importing the master PGP key is sufficient for verifying signatures made with any of its sub keys.
Step 2: Verify the PGP signature
Once you have imported the key, you can decide whether you want to mark it as trusted. This is not strictly necessary for the checks we are making here. For more information, see the Qubes-OS project documentation.
You can then verify the authenticity and integrity of a downloaded package from its detached signature by running the following command:
$ gpg --verify KeePassXC-*.sigThe output should look like this (the file name will differ obviously):
gpg: assuming signed data in 'KeePassXC-X.X.X-Win64-Portable.zip' gpg: Signature made Thu 22 Oct 2020 01:57:33 CEST gpg: using RSA key C1E4CBA3AD78D3AFD894F9E0B7A66F03B59076A8 gpg: Good signature from "KeePassXC Release <release@keepassxc.org>" [unknown] gpg: WARNING: This key is not certified with a trusted signature! gpg: There is no indication that the signature belongs to the owner. Primary key fingerprint: BF5A 669F 2272 CF43 24C1 FDA8 CFB4 C216 6397 D0D2 Subkey fingerprint: C1E4 CBA3 AD78 D3AF D894 F9E0 B7A6 6F03 B590 76A8

1: Download:
VeraCrypt_PGP_public_key.asc
VeraCrypt-setup-1.24-Update7.exe
VeraCrypt-Setup-1.24-Update7.exe.sig
2: Import VeraCrypt_PGP_public_key.asc into GPA
3: Set trust to Ultimate or (Right Click set owner trust)
4: In Powershell do this:
Compare RSA key given to fingerprint here:

Set the PATH variable as shown here
Use the command:
gpg --verify putty-64bit-0.78-installer.msi.gpg putty-64bit-0.78-installer.msi
Which gives the result:
E:\My-Valnondat\Foss\Foss SSH>gpg --verify putty-64bit-0.78-installer.msi.gpg putty-64bit-0.78-installer.msi

gpg: Signature made 29/10/2022 08:06:33 GMT Summer Time

gpg:                using RSA key 2CF6134BD3F77A6588EBD668E4F83EA2AA4915EC

gpg: Can't check signature: No public key
In Kleopatra click Lookup on Server and search for the above mentioned RSA key. Then select and import the key:
From the Make Use Of Website
Follow these” steps to connect to a hidden wireless network in Windows 10:
Click the Wi-Fi icon in the lower-right corner of the taskbar.
Select Network & Internet Settings.
Next, click Dial-up on the left-side navigation panel, then select Set up a new connection.
From the pop-up, select Manually connect to a wireless network and click Next.
Enter the network name, security type, and security key.
Select the checkbox under Connect even if the network is not broadcasting and Start this connection automatically.
Tap Next, and your device will automatically connect to the network.
Follow the method below from the GnuPG Gpg4win website
OpenPGP signatures
If you upgrade your Gpg4Win version, you already have gnupg installed and you can verify the integrity of the downloaded file, by its OpenPGP signature. To do so, you have to download, next the file, the signature of the file. You’ll find the download-links on the Gpg4Win package integrity site. The ey, with which the files are signed, is also given on that page. You have to import the public key and now you can validate the signature of the file with the command
read more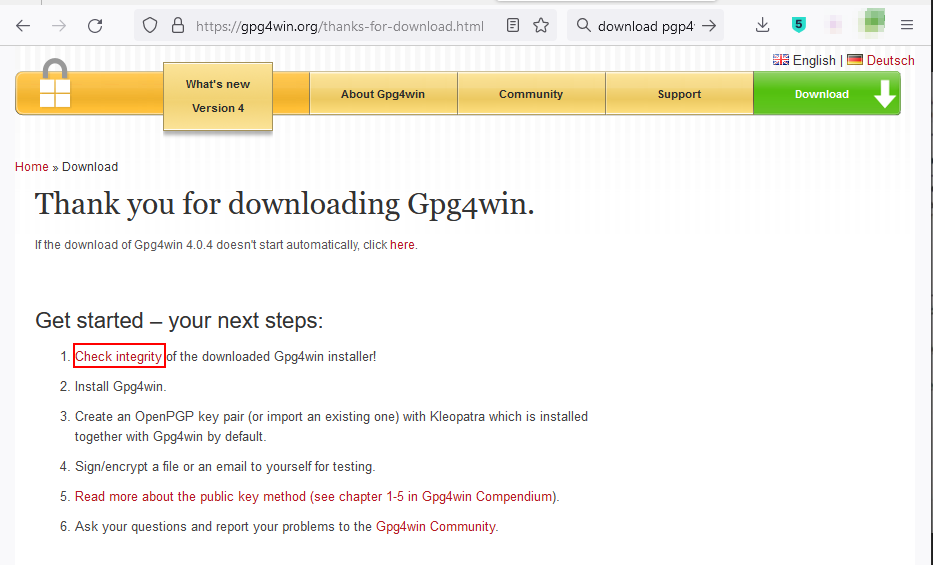
Download the Gpg4win windows installer after which you get this message:
(Click Check Integrity to show the signature to compare against)
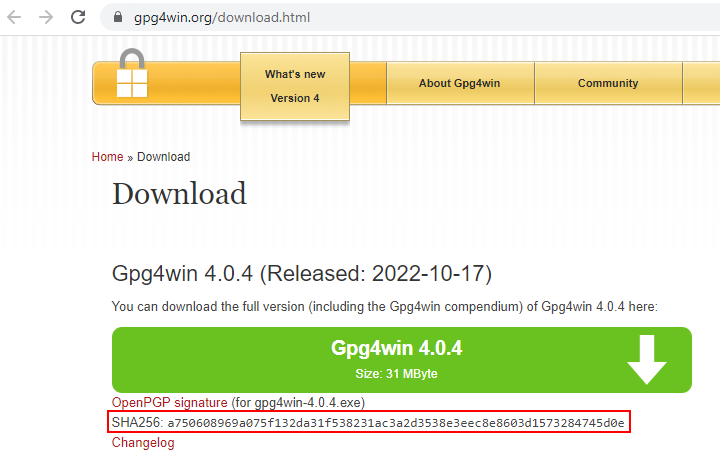
Use the signature quoted below to compare against what is shown by either going through the UAC conformation below or right click and propertes. From here.
Double click to execute the downloaded excutable:
Windows UAC comes up. Click Show more details:
Click “Show information about the publisher’s certificate”
Check against the signature on the download page
]
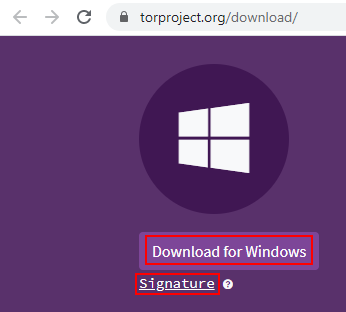
Download the software and the signature
Download pgp4win
Install GPA as part of the install
How to get the signing key
read more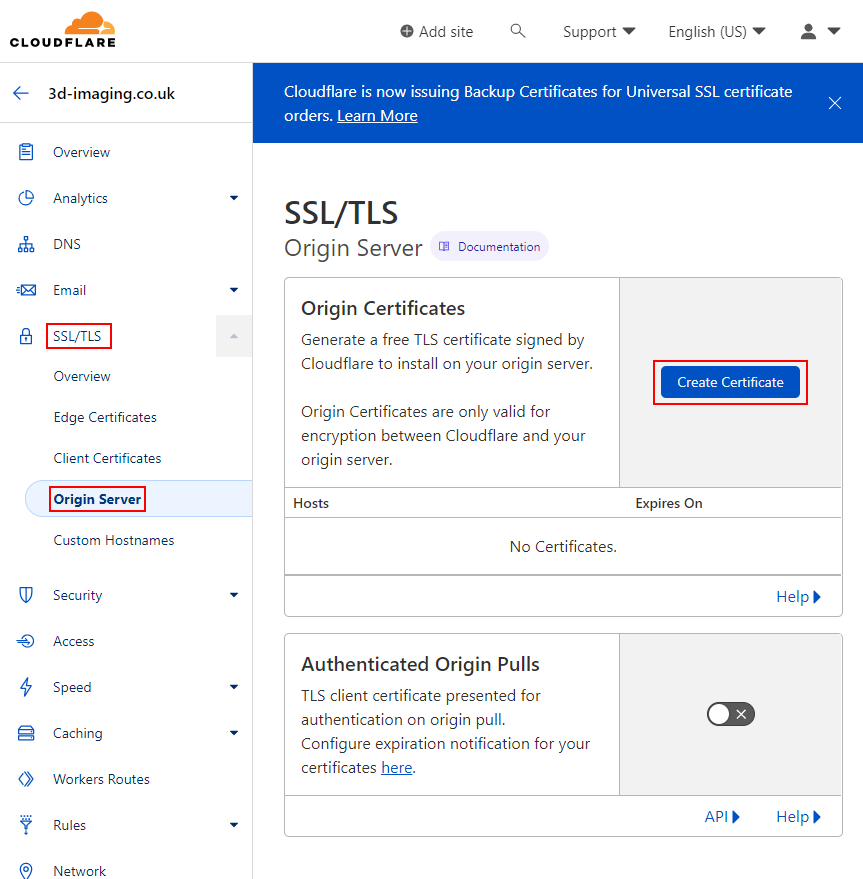
Generally follow this
Create Origin Certificates:
Next page leave as default and click Create:
Make two files locally on your computer:
Upload the files to your Linode server using Filezilla:
Follow the appropriate tutorial for adding SSL to the linode server Fromhere
and from here
To SSH into the Linode server need to follow this and download Putty from here
read more


